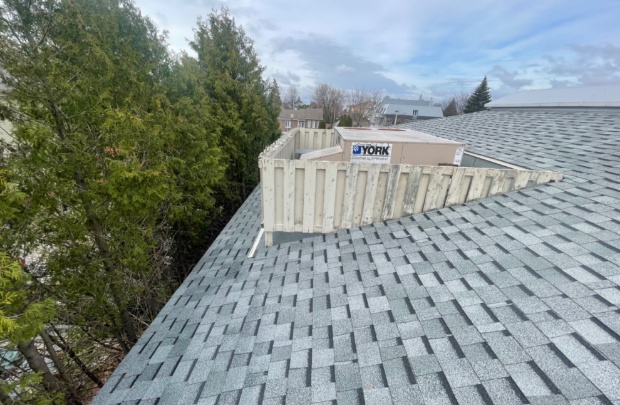
Asphalt shingles are popular with consumers not only because they look good, but also because they are durable and affordable.
However, installing shingles is a delicate process that requires skill and attention to detail. In fact, if you don’t have any experience in roofing installation, you could fall into one of the many pitfalls that await amateur roofers.
Don’t be discouraged! In this guide, our roofers offer valuable advice so that you can successfully install asphalt shingles.
How to cut asphalt shingles
When it comes to cutting asphalt shingles, there are several popular methods to choose from. Let’s take a look at the two most common: with a manual shingle knife or using a roofing air knife.
Shingle knife
A shingle knife is a popular tool for making precise cuts on asphalt shingles. We recommend following these basic steps:
- Make sure you have a sharp hook blade. A dull knife can make cutting more difficult and less accurate.
- Measure the desired length of asphalt shingle with a tape measure and mark it on the shingle.
- Place the shingle on a stable, solid surface, making sure it is properly supported.
- Hold the shingle knife comfortably, keeping your fingers away from the blade.
- Apply firm, steady pressure to cut the shingle in a single stroke, following the line you made earlier.
- Repeat this process for each shingle, making sure each cut is straight and precise.
Roofing air knife
Using an air knife can be a faster and more efficient option, especially if you have a lot of shingles to cut. Here’s how to use a roofing air knife to cut asphalt shingles:
- Get a roofing air knife. Make sure the blade is clean and in good condition.
- Mark the correct length of asphalt shingle using a tape measure and a pencil or piece of chalk.
- Place the asphalt shingle on a solid surface and make sure it will not move or vibrate with the pressure of the air knife.
- Position the air knife so that the blade is aligned with the line you have drawn on the shingle.
- Squeeze the trigger and gently pull the blade across the shingle, applying constant pressure. Follow the line to make a clean cut.
- Keep your hands and fingers at a safe distance from the blade while cutting.
Note: Whatever technique you use, remember to wear protective equipment including safety goggles and gloves to avoid accidents.
How to install asphalt shingles on a roof
Installing asphalt shingles is crucial to building a durable, aesthetically pleasing roof. Keep reading to learn how to install asphalt shingles from professional Montreal roofers.
Step 1: Gather the necessary materials and tools
First, gather all the materials you’ll need to install your asphalt shingles:
- Shingles
- Galvanized roofing nails of the appropriate length
- Plastic roofing cement
- Self-adhesive eave protection membrane
- Synthetic underlayment
- Valley and flashing protection (weatherproofing)
- Roof ventilators
To complete your project as easily and quickly as possible, equip yourself with appropriate tools:
- Roof-stripping shovel tool
- Shears (for cutting metal flashings)
- Chalk line
- Knife with hooked blade (for cutting felts and blanket rolls)
- Square
- Roofing hammer and/or pneumatic nailer
- Air compressor for use with pneumatic tools
- Caulking gun
- Tape measure
- Trowel
- Nail bar
- Personal protective equipment such as harnesses, ropes, runners, energy absorbers, anchors, goggles, and steel toe boots or steel caps
Getting all this equipment together can be complicated and costly for an amateur roofer. To make things easier, contact a roofing professional!
Step 2: Install the underlay system
Let’s assume that the old shingles have already been removed and the waterproofing membrane and flashings have already been installed.
Once your set-up is complete, draw a chalk line from the top to the bottom of the roof. This applies to the use of “3-tab” shingles, the most popular type of asphalt shingle, which are installed from the bottom up (the ladder pattern).
For laminated shingles, the installation procedure will be different. The first course of shingles (on the lower part of the roof) will be composed of 3 shingles, the 2nd course of 2 shingles and the 3rd course of 1 shingle.
Step 3: Install the asphalt shingles
Now you need to nail the shingles in place with an air nailer and trim the excess with a knife. Leave the excess strips slightly above the ridge, however, as these will be trimmed later.
When installing asphalt shingles, be careful to nail the shingles where indicated to ensure maximum pull-through resistance. Four nails per shingle are usually enough, but it is even better to use 6 nails for maximum long-term adhesion.
When the siding crosses the corners of a gable or other sloping area (valley), be sure to cut the shingles at an angle to reduce the risk of your roof leaking.
To keep the rows straight, we recommend drawing horizontal lines at regular intervals.
Step 4: Caulk
Next, caulk each joint and crack and use plastic cement to seal them off. While you’re at it, now is a good time to seal your chimneys, vents, roof ventilators and ridges as well, but remember to leave a free pathway for water to drain off your roof.
Step 5: Cleaning and finishing
Finally, take the time to do a meticulous finishing job. This includes cutting off excess shingles and applying sealants.
Always remember to work safely
We must emphasise the importance of safety when installing asphalt shingles or doing any other work at height.
Always remember, this type of work involves adhering to building codes and respecting occupational health and safety standards.
It’s best when roofing work is carried out by a team of professionals after doing a roof inspection.
Couvreurs Duro-Toit can install your asphalt shingles
Don’t underestimate the complexity of installing asphalt shingles on a pitched roof. This work is best left to professional roofers if you do not feel completely comfortable with any of the steps outlined above.
When you rely on Duro-Toit, you benefit from personalized service, expert advice and superior workmanship. We’re dedicated to customer satisfaction and we’ll build a roof that meets your needs and adds value to your property.
If you would like more information on our asphalt shingle installation service or to learn more about our other roofing products and services, contact us today!


