A common problem for building owners in snowy climates is the formation of ice dams on their roofs.
Ice dams are build-ups of ice and snow on the edges and eaves of a pitched roof. Ice dams can result in beautiful icicles, but they can also damage the roof, break gutters and cause water infiltration.
Several strategies have been developed over the years to prevent the formation of ice dams and the resulting property damage. One of the most popular strategies is roof de-icing cables.
In this article, Montreal roofers explain how ice dams form and how roof de-icing cables can help counteract the process.
What is roof de-icing cable?
A roof de-icing cable, also known as a roof heating cable or heating wire, is a roofing system designed to prevent ice and snow build-up on roofs, gutters and downspouts.
A heavy-duty electric cable is energized to generate heat. This heat prevents ice from forming and melts snow to preserve the roof structure and prevent potential damage caused by ice build-up.
How can roof de-icing cables help prevent ice dams?
Roof de-icing wires use electrical resistance to generate heat, melting pathways through the snow and ice on the roof. The channels allow meltwater to run off instead of freezing into ice dams or seeping into the roof.
Please note: De-icing cables cannot melt all of the snow on the roof or completely prevent ice dams. Roof snow removal is still important when there is a thick layer of snow, even if the roof is equipped with de-icing cables.
Advantages of installing roof de-icing cables
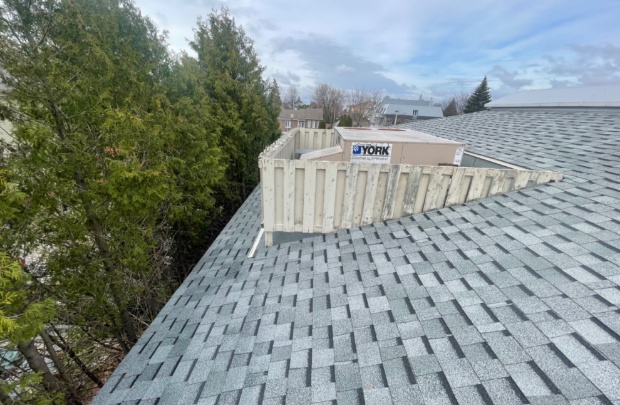
If the de-icing cables are good quality and are installed by certified professional roofers, they can certainly minimize the water accumulation that causes ice dams and help slow their growth. They are generally placed in patterns along eaves, around chimneys and skylights and in gutters or drainpipes.
Although de-icing cables aren’t a permanent solution, they are an excellent choice for homeowners who need a quick solution. They cost much less than the roofing work needed to seal attic leaks, install proper insulation and create appropriate roof ventilation systems.
There are 4 main advantages of to installing roof de-icing cables:
- Prevention against ice formation and ice dams
- Protection against structural damage caused by the weight of snow
- Reduced maintenance and repair costs
- Improved safety
Choosing the right type of de-icing cable
Selecting the right type of de-icing cable will ensure that your roof is effectively protected against the harsh elements during winter. There are several different types of heating cable on the market, each suited to specific applications and climatic conditions.
Types of heating cables
- Self-limiting heating cables: These cables are designed to adjust their heat output according to ambient temperature. They are ideal for climates where temperatures vary dramatically.
- Constant wattage heating cables: These cables provide a constant amount of heat and are often used in areas where temperatures remain uniformly low.
- Temperature-controlled heating cables: Fitted with sensors, these cables adjust their heat output according to weather conditions, making them energy-efficient.
Choosing the right cable for the building structure
- Roof type: The choice of cable depends on the type of roof (slate, tile, metal, etc.). Some cables are better suited to specific surfaces than others.
- Roof layout: Consider roof features such as slope, valleys, gutters and downspouts. This will influence the type of cable and installation method you choose.
Choosing a cable to suit the climate
- Intensity of winter conditions: Regions subject to heavy snowfall and extremely low temperatures (like Quebec) will require sturdy, high-performance cables.
Roof heating cable installation
Installing a roof heating cable is a process that requires precision and attention to detail. Here’s a step-by-step guide to installing de-icing cables. Remember, always follow the manufacturer’s instructions!
1. Preparedness and safety
Start by reading the manufacturer’s instructions carefully. Each cable type may have specific installation requirements.
Make sure you have all necessary tools and materials at hand.
Switch off the power supply to the installation area and use appropriate safety equipment.
2. Planning the layout
Calculate the total cable length required, remembering to measure gutters, downspouts and problem areas on the roof.
Plan where the wiring will cross the roof, making sure to cover areas where ice and snow tend to accumulate most often.
3. Installing the de-icing cable
Start by securing the cable along roof edges, in gutters and around downspouts. Use the fasteners and clips supplied by the manufacturer.
Make sure the cables don’t cross each other and are distributed evenly.
Maintain the recommended spacing between cable loops for even heat distribution.
4. Electrical connection
Connect the cable to the electrical system according to the manufacturer’s instructions. If you aren’t sure how tot do this, exercise caution and call in a qualified electrician.
If your system is equipped with a thermostat or sensor, you’ll need to install this as well.
5. System test
Once installation is complete, turn the power supply back on and verify that the system is working correctly.
6. Post-installation maintenance
After installation, inspect the system regularly for any flaws or damage.
Installation of heating cables: safety and regulatory compliance
Installing roof heating cables involves following strict safety procedures, including disconnecting the power supply and using protective equipment. Work at heights must be carried out using fall-prevention equipment, and you must never attempt it alone. Be sure to respect the wire spacing recommended by the manufacturer to prevent overheating and reduce the risk of fire.
When installing heating cables, you must comply with electrical and building regulations, using certified equipment that meets established criteria for safety and quality. To guarantee that your cables are installed correctly, call on qualified professionals.
Install de-icing cables to protect your roof during the winter!
It’s very important to understand that roof de-icing cables cannot prevent ice dams from forming or eliminate them completely. They simply melt channels through the dams to help meltwater flow off the roof. To prevent ice dams from forming in the first place, you must address the root of the problem—an overheated roof caused by heat leakage from inside the house and/or a lack of maintenance in specific weather conditions.
Thankfully, Duro-Toit roofers are here to help homeowners whose roofs are prone to ice dams. After inspecting the roof, we will suggest a customized approach that includes all of the work needed to keep your roof at the ideal temperature.
Contact us today for more information!
More posts
Guide to Flat Roof Construction in Quebec
8 April 2024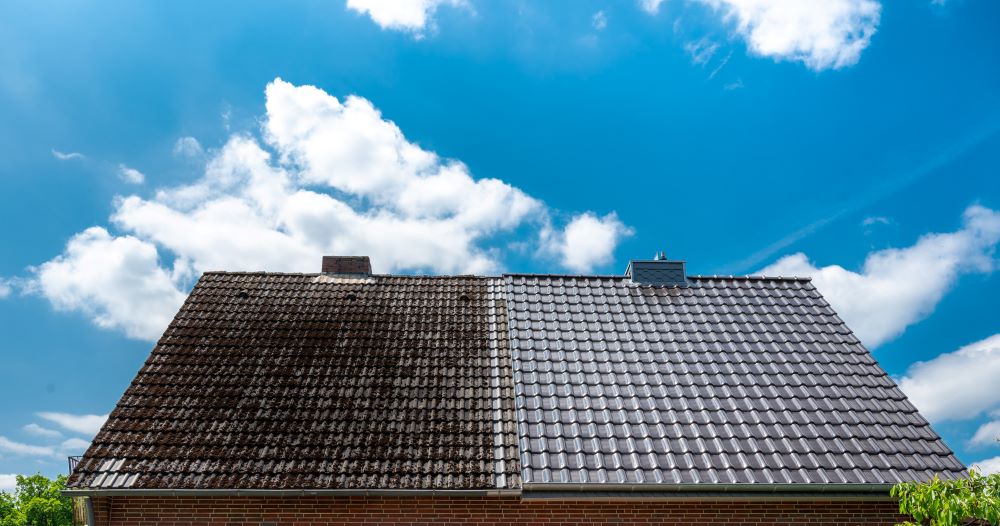
6 Tips to Extend the Life of Your Roof
21 March 2024